Thursday, December 1, 2016

{ Trash to Treasure } Accent Chairs Before & After!


I have a confession: I love to make old things new. I really really do. I've been doing this so for as long as I can remember. Like when I was 10, I would make Barbie clothes out of old clothes and orphan socks (strapless dresses #allday). As I got older, I was into hardcore up-cycling: shoe boxes into glam memory boxes (still do it to this day!) and upgrading my wardrobe with bleach, paint or scissors. But today, nothing gets me going like flipping furniture, oh yeah!


Take my latest furniture flip as the perfect example.


I found these chairs and turned their dark, dreadful exterior into something I could live with - literately and figuratively. The BEST art however, is that this project only cost me a total of $13!!

The chairs = FREE, I found them up the block, around the corner. True story.
The Fabric = $4.00 A Target Threshold curtain from the Goodwill ($24 original price)
The Paint = $9 Behr Paint, from Home Depot's "Oops Paint" selection; paint left behind by a customer)
Total = $13


I have this motto I found on Pinterest (really wish I knew the author, so I could give them a long hug)
"Do what you can, with what you have". I apply this mantra daily, maybe multiple times a day.

With that said, I use my apartment's "foyer" to do my DIY projects. {Clearly, a separate garage is at the very top of my dream home must-haves} Fortunately, my neighbors have accepted this side of me. When working on this project after breakfast, one of my neighbors came out and gave me some plastic gloves, she said "don't ruin your manicure". #heartwarming


My littlest and bestest helper, my daughter. She's always volunteering to help. 9 out of 10 times I say no #sorrynotsorry, its just that 9 out of 10 times I'm working with products and equipment not safe for kids, except today! I allowed her to help me paint because the project was fool-proof! I made my own chalk-paint. And one of the best things about chalk paint (besides the fact it dries super fast) Its that it doesn't leave streaks!! She couldn't mess up the paint job, if she tried! So while she gave the chairs their first coat of paint, I got to work on the upholstering part of the chairs.

Here's what I used to upholster the chair. But all you REALLY need is The Staple gun.


This was an inexpensive staple gun from The Home Depot. If you've never upholstered before, I don't recommend getting a more sophisticated tool, keep it simple until you've mastered the skill.

The first thing I did, was remove the (disgusting, dusty) vinyl that the seats had. I used a letter opener,  to pry off the old staples, so fancy.


What is not shown: when I cut the fabric to size. 

All you need to do: trace the old piece of fabric on your new fabric, cut it and staple it.
Important step: Start with the corners.
Give it a clean and neat appearance by folding a pleat as you staple.  


I also considered the pattern on the fabric, I did my best to keep the pattern symmetrical. This especially necessary when working with stripes.

Once the chairs were completed, I screwed them back to the chair frame. It was a really simple project. I can't wait to do it again!


Aren't they grand? It definitely gave our living room a little special something. 

Thanks for stopping by & Happy Thriftin'

Sincerely,
Sarah


Sunday, October 16, 2016

My Prima Ballerina's 3rd Birthday Bash!


I am finally able to share pictures of my daughter's 3rd birthday party from this past February! Long story short, these pictures were held captive in my external hard-drive and have finally been set free! 
[insert emotional crying emoji here]

LET THE FESTIVITIES BEGIN

This birthday party was a true labor of love. Like 250 hours of labor and loads and loads of love.

I began to plan my daughter's party in late October (2015). I did have to take a break in mid December because my December baby was celebrating his 6th Birthday and well he's a super kid, so I had to give him a super hero kind of party. period. But soon after, it was back to ballerina party mode. It was a big deal because this would be my girl's FIRST party EVER.

I just had to share it with y'all because if you're a Mom of one or many, you want two things for your child on their birthday: 1. That your child is really, truly Happy and 2. That you don't break the bank, making her happy. I am happy to say, we accomplished both those things and so here's how we did it!     [I've also included affiliate links to some of the products I used]


For starters, we saved big by hosting the party at home. Sure we don't have the ideal space for entertaining on a daily basis, but we do when we shove our furniture in the bedrooms!


Secondly, we saved bigger cha-ching by avoiding rental fees.  I took my two folding 6ft tables, joined them together and used white tablecloths, topped with lace curtains to hide the plastic industrial look and give it a pretty yet functional seating area  (when styling on a budget, you get creative in the best ways!).  For the tablescape, I used several different elements to fill the large center.  A birdcage on a cake stand with its own DIY tulle skirt, floating candles, her first pair of ballet flats, a cylinder with wands for the girls and individual place settings from, you guessed it, Dollar Tree.


My apartment didn't come with a fancy crystal chandelier, shucks.  So in order to give the room a wow factor, I made a large cluster of tissue paper pom poms, tissue flowers, paper lanterns, like these, ballerinas die cuts and a bead garland (also from DT).  The secret sauce: you can never have too much stuff in your cluster.  Like Ever.  And I don't know if there's anything more inexpensive than tissue paper.

{ When the party was over, I moved this cluster and incorporated into her room decor }


Party favors are usually where I like to spend the bigger buck. Its your way of thanking your guests from coming to celebrate with you and for any gifts that you may have received.  However, I didn't have the big bucks to spend so I made all of my party favors: each ballerina got her own tu-tu!  The tulle skirts were so easy to make but definitely the most time consuming.  But they looked so good on display and on the mini ballerina's it was so worth it! I purchase this tulle.


The Mommas received miniature cake stands that I made (tutorial coming soon) :)

Ballerina die cut, hanging from fishing wire.


This monogram was my favorite DIY! I had found a giant G made of foam board, waking by a GAP store one day and I just had to have it.  I had sprayed it pink and had it mounted over my daughter's headboard.  Then I found this pin on Pinterest using coffee filters as flowers and this beauty was born.  Following this post, I will be sharing individual posts on how I made this and the other fun decor used for the party!  Comment below and let me know which one was your favorite!


{Sigh! This little onesie was how I shared the gender with my beau. He had an inkling that it was a girl, but the surprised still made him surprisingly emotional. It was so sweet}

Another die cut I made.


{That wooden dollhouse above my hutch was a special gift for my daughter from one my dearest friends. She had scored it at a local thrift, and being a mother of four boys, she just couldn't help but spoil my girl with such a beautiful dollhouse! I practically cried, it was something I always wanted as a little girl, so for my baby to have one, made me even more happy}


And now for the cake table, easy DIY backdrop and special custom cakes from none other than my dearest childhood friend and my daughter's Godmother; Oribel from Sugar Cuppies!


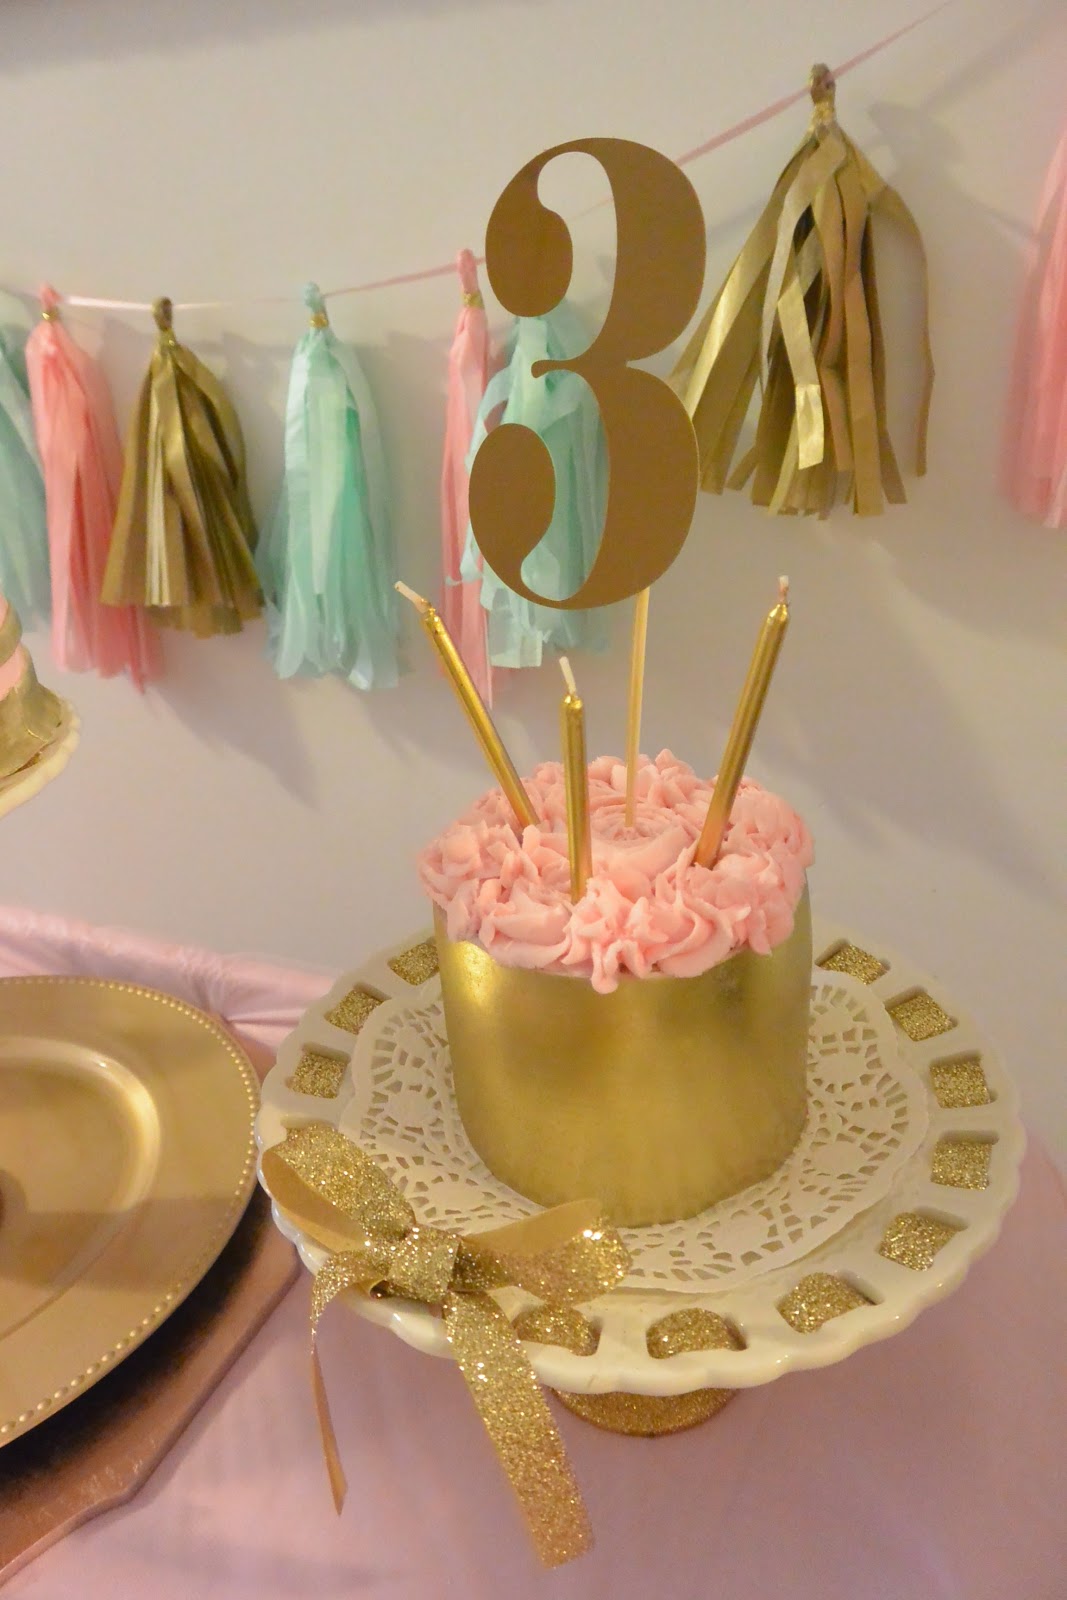
Rather than one giant 3 tier cake, I wanted 3 individual cakes. Oribel's fondant skills incorporated the colors and flair in edible versions of the party itself! They were just as yummy as they were pretty! 


I then cut cake toppers using this (My 2015 birthday gift from my beau and bestie!) My favorite birthday gift (besides life itself), to date!

I made these cake stands from plates I scored at the thrift for .50, gold glitter ribbon from DT and a large candlestick I coated with gold glitter, I adhered it using crazy glue... its still standing tall. 


The tissue paper garland was another DIY, obvi.

The pinwheels were adorned with doilies and ballerina silhouettes that I cut using this. I made little tutus using leftover tulle. I placed 3 of these in the middle of a gold vintage frame I found in my building. You have no idea how I geeked I was when I scored this find!


Last but not least, we celebrated my girl, with style and grace and I wouldn't have wanted it any other way, even the hiccups... the many many hiccups (like getting sick with Strep throat the day before the party, yeah. that happened). The most important thing remained: Gabby was happy.

Here's my girl blowing her candles for the 3rd time. Ha!
(For privacy reasons, I've excluded pictures of my friends and their little ballerinas.)


El Fin.


.:Next on Sarah Sweet & Simple:.
I will be sharing with you how I made my own party decorations using inexpensive materials so you can give your next event that truly custom and personal touch :) 


And let me know if you have any questions or comments below, I'd love to hear from you!

Sincerely, Sarah